Flashing LineageOS 14.1 for Samsung Galaxy Note 8.0 (n5110)
A guide to flashing the compiled LineageOS 14.1 ROM and recovery image to the Samsung Galaxy Note 8.0 (n5110).
March 10, 2026
Flashing LineageOS 14.1 for Samsung Galaxy Note 8.0 (n5110)
In the previous post, we built the custom LineageOS 14.1 ROM and recovery image for the Samsung Galaxy Note 8.0 (n5110).
In this post, we will cover the process of flashing the build outputs to the device and verifying its operation after booting.
Flashing recovery.img using Heimdall
While you can use
Odin for flashing, I preferred using Heimdall as I like working in a Linux environment.Since the Heimdall package is already available in the Ubuntu repository, it can be easily installed using
apt.Install Heimdall in Ubuntu using aptsh
After installation, enter Download (Odin) mode by long-pressing the Power + Vol Down keys simultaneously.

Check Heimdall connectionsh
Once the device is correctly recognized by
Heimdall, flash the recovery.img file using the flash command.Flash recovery.img using Heimdallsh
It seems the image has been successfully flashed.
Now, enter Recovery Mode and install the custom ROM image.
Now, enter Recovery Mode and install the custom ROM image.
Enter Recovery Mode & Wipe
With the recovery flashed, proceed to initialize the device to install the new custom ROM.
- Enter recovery mode (Lineage Recovery) by pressing the Power + Vol Up + Home keys simultaneously.
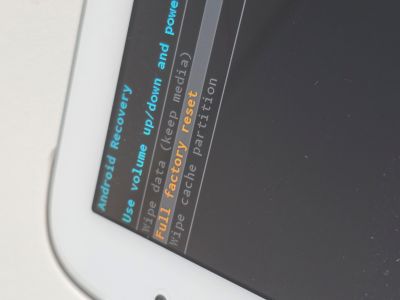
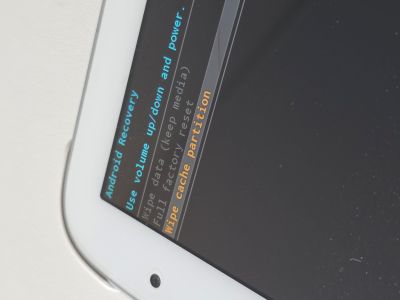
- Perform a Factory reset and wipe the Cache partition to clear existing data.
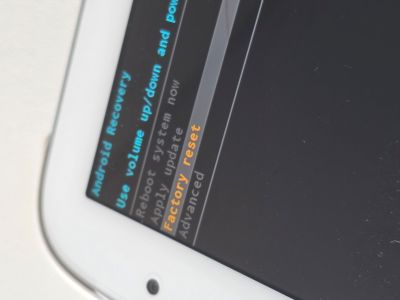
- To install the ROM, select the Apply Update -> Apply from ADB menu to enter sideload mode.

Setup udev Rules (for Linux)
To use ADB Sideload in a Linux environment like Ubuntu, you may need to configure udev rules to assign appropriate permissions to the USB device.
When you connect the device in Sideload mode to your PC, you can find logs like the following in
When you connect the device in Sideload mode to your PC, you can find logs like the following in
dmesg.dmesg outputsh
Use the Vendor ID (
18d1) and Product ID (d001) identified above to create or modify the /etc/udev/rules.d/51-android.rules file.
Add the following content to grant USB device access permissions to the plugdev group.Edit /etc/udev/rules.d/51-android.rulessh
After adding the entry, reload the udev rules and restart the service.
Reload udev rulessh
Flash LineageOS via ADB Sideload
Now, restart the ADB server and check if the device is correctly recognized in
sideload status.Check ADB devicessh
If the device is correctly recognized as
sideload, transfer the built lineage-*.zip file to the device to start the installation.ADB Sideloadsh

Verify Installation
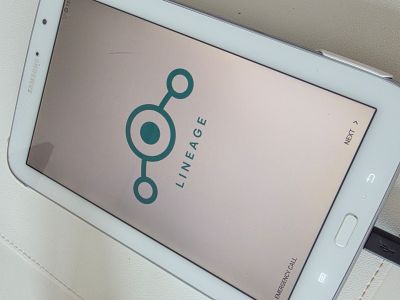
After the installation is complete, reboot the system (Reboot system now). You should see the Lineage OS logo as it boots up normally.
Just like standard Android, you need to enable the Android debugging option in Developer Options for ADB connectivity.
Also, set Root access to 'ADB only' to use root privileges in the ADB environment.
Also, set Root access to 'ADB only' to use root privileges in the ADB environment.
When testing the
This is because the
adb devices command for ADB connection, the device might not be recognized.This is because the
idVendor and idProduct values might have changed from those used in Sideload mode.dmesg after rebootsh
Just as we did before, add the newly changed
idVendor and idProduct values to the udev rules.Edit /etc/udev/rules.d/51-android.rulessh
After adding them, reload the udev rules and restart the service.
Reload udev rulessh
Now, connect via
adb shell and check the image version.Verify build versionsh
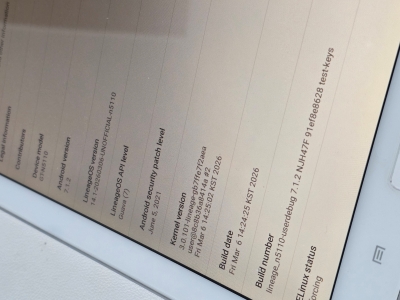
You can confirm that the system has booted normally with the custom-built image version.
You can also verify the version information in the About tablet menu of the tablet UI.
Conclusion
The entire process, from image building to setting up the flashing environment, is now complete.
Now you can modify the code as you study AOSP and apply it directly to the device.
I will decide which parts to focus on analyzing and modifying after exploring the AOSP code a bit more.
Now you can modify the code as you study AOSP and apply it directly to the device.
I will decide which parts to focus on analyzing and modifying after exploring the AOSP code a bit more.