Getting Started with the SmartThings API - Environment Setup
A beginner's guide to setting up your environment for the SmartThings API. This post covers generating tokens and making your first API calls.
January 29, 2026
Getting Started with the SmartThings API - Environment Setup
SmartThings API를 사용하여 디바이스 제어를 해야 할 일이 생겨 환경 설정을 해보았습니다.
API를 호출하여 현재 내 SmartThings에 등록된 디바이스 리스트를 확인해 보도록 하겠습니다.
API를 호출하여 현재 내 SmartThings에 등록된 디바이스 리스트를 확인해 보도록 하겠습니다.
1. Get a Personal Access Token
SmartThings API를 사용하려면 역시나 개인용 액세스 토큰(PAT)이 필요합니다.
이 토큰은 인증 키 역할을 합니다.
이 토큰은 인증 키 역할을 합니다.
1. Go to the Personal Access Token page and log in with your Samsung Account
https://account.smartthings.com/tokens에 접속하여 Samsung Account로 로그인을 합니다.
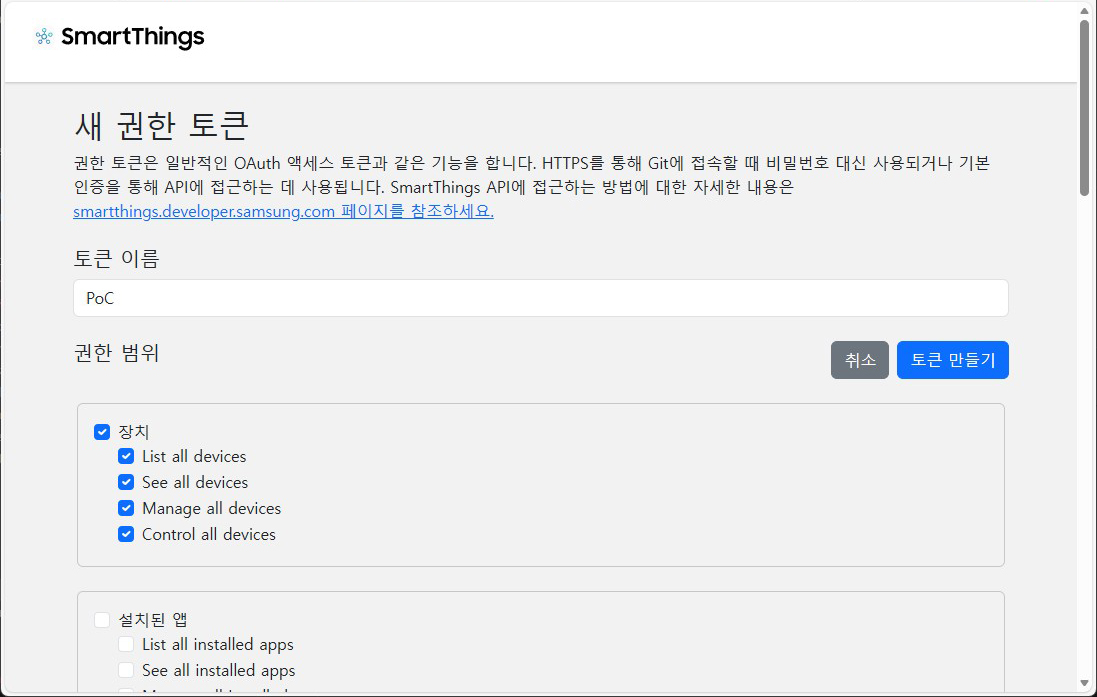
2. Name the token, select scopes, and create
식별하기 쉬운 이름을 지정한 후 토큰에 대한 권한의 범위를 선택합니다.
보안 관련된 권한은 언제나 필요한 최소한의 범위만 부여해야 합니다.
저는 디바이스 제어만 필요하기 때문에 Device에 대한 권한만 선택했습니다.
보안 관련된 권한은 언제나 필요한 최소한의 범위만 부여해야 합니다.
저는 디바이스 제어만 필요하기 때문에 Device에 대한 권한만 선택했습니다.
3. Save the token
토큰이 생성되면 안전한 곳에 복사하여 저장해야 합니다. 이 토큰은 다시 볼 수 없습니다.
2. Make an API Call
이제 토큰을 사용하여 API를 호출할 수 있습니다.
간단히
YOUR_TOKEN에는 방금 저장한 토큰을 사용합니다.
간단히
curl로 API를 호출하여 디바이스 목록을 확인해 보겠습니다.YOUR_TOKEN에는 방금 저장한 토큰을 사용합니다.
List all devices using curlshell
요청이 성공하면 장치 목록이 포함된 JSON 응답을 받게 됩니다.
Respone from curljson
3. Make an API Call Using Python
Python 으로도 sample code 작성해 보았습니다.
List all devices using pythonpython
4. Next Steps
이제 SmartThings API를 이용해서 Device Control을 위한 환경 설정이 완료되었습니다.
심심할 때마다 SmartThings API 문서를 참고하여 이것저것 해볼 예정입니다.
심심할 때마다 SmartThings API 문서를 참고하여 이것저것 해볼 예정입니다.